
Learning OBS Studio: An Introductory Guide to Professional Recording and Live Streaming
OBS Studio (Open Broadcaster Software) can help you if you’ve ever been intimidated by the thought of live broadcasting or creating high-quality movies. The versatility of this free, open-source tool makes it a favorite among producers, but new users may find its wide range of capabilities daunting. Do not be alarmed! With the help of this detailed tutorial, you will quickly go from being a beginner to a confident user.
Initial View: Using the Interface of OBS Studio
OBS Studio has a clear UI that is separated into several important sections when you first run it. The preview window displays what viewers see when you stream or record. Controls include access to settings and start/stop buttons for recording and streaming.
Let’s set up now!
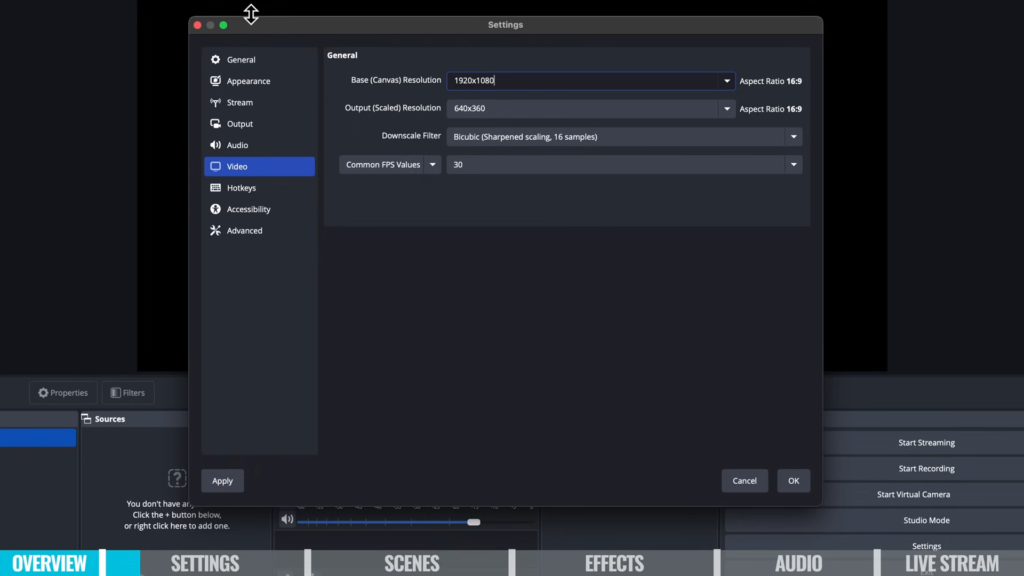
First, Modify Your Preferences Go to Settings > Video to change your frame rate and resolution: Make sure that the base (canvas) resolution matches the screen resolution (e.g., 1920×1080 for 1080p). Scaled Output Resolution: For smooth processing, keep this exactly the same as your canvas. Frame Rate: For the majority of content, 30 FPS is sufficient; for fast-paced gameplay, increase to 60 FPS.

After that, select Output:
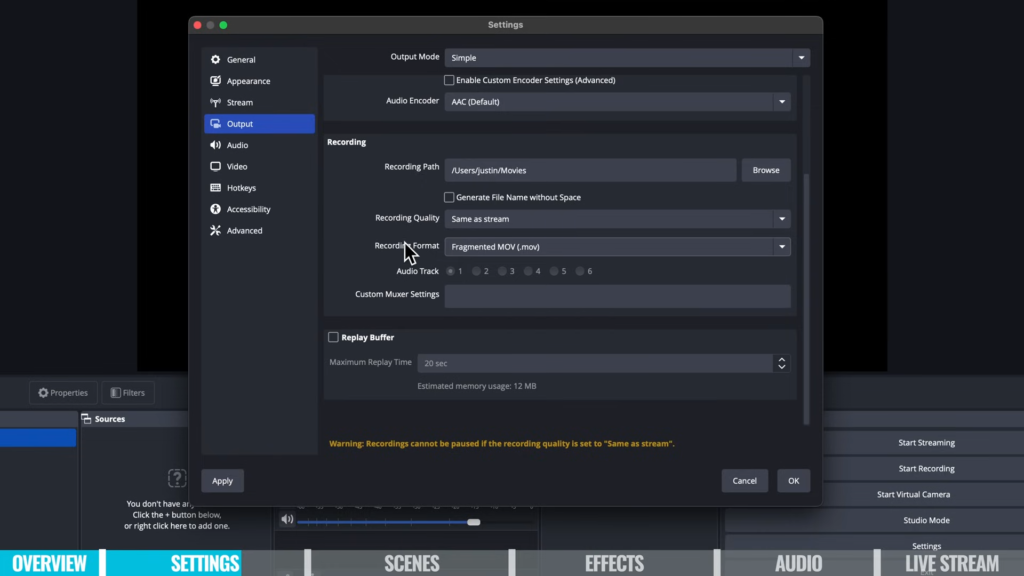
Streaming: Choose your bitrate (if your bandwidth allows it, 5,000 Kbps is the best for 1080p streaming). Recording: Choose the file type (MP4 is often appropriate) and quality (always align with streaming parameters). Pro Tip: To connect OBS to services like Twitch or YouTube, go to Stream and sign in directly.
In Step Two, Create Your Sceneries
You can switch between scenes while recording or streaming. To create one: Click the Add symbol under “Scenes,” then give it a name, like “Webcam Feed.” Include the following in the “Sources” section: You can use your webcam to record videos. Display Capture: You can share your entire screen or just a single window. Text/Images: Add logo overlays or captions.
For example:
Scene 1: Full-screen webcam.
Scene 2: Screen sharing is done with a small webcam overlay. To resize and rearrange sources, drag their borders.
Step 3: Enhance the Glowing of Your Audio
Avoid muted sounds or background noise:
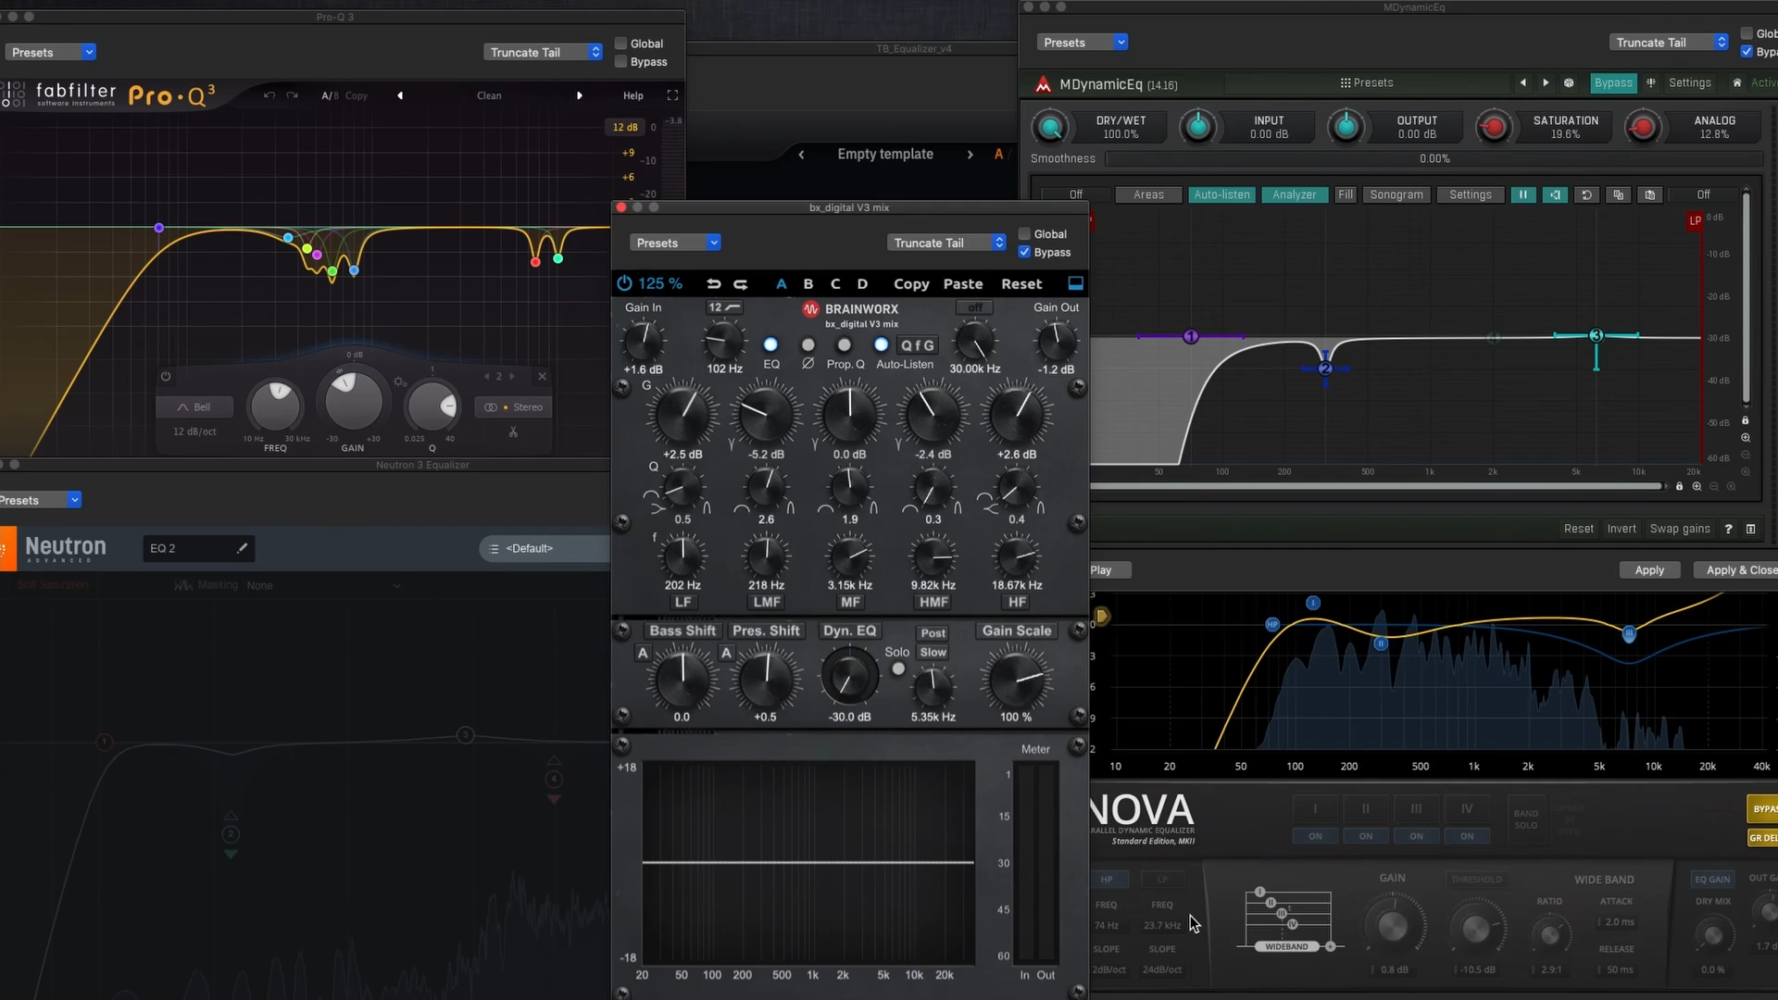
Mic Setup: To select your microphone, navigate to Settings > Audio. Make adjustments to the mixer’s levels to stay in the green (avoid red!) range. Desktop Audio: To enable or disable system noises, press the mixer’s mute button. Bonus: Use audio filters like noise suppression (right-click mic source > Filters) to eliminate keyboard clicks and fan hum.
Step 4: Go live or record streaming: After choosing “Start Streaming,” monitor the chat using OBS’s dockable panels. Recording: Choose “Start Recording”; the files will be saved in the Settings > Output location of your choosing. Turn on Studio Mode to see changes before they go public. Perfect for alterations at the last minute! Professional Tips for Developing Your Virtual Camera: Use Zoom or Teams to use OBS as a webcam. Click “Start Virtual Camera” in your video app, then select “OBS-Camera.”
Transitions: Under “Transitions,” choose “Cut” (instant scene switch) instead of “Fade”. Filters: Right-click sources to apply color correction, cropping, or chroma key (green screen).
Final thoughts
OBS Studio provides up a world of creative options after you grasp the basics. Start with the fundamentals, experiment with various scenes, and then gradually explore more sophisticated capabilities like filters and studio mode. Whether you’re streaming games, conducting webinars, or shooting classes, OBS provides you with access to excellent production.
Frame Rate: 30 FPS is standard; 60 FPS is ideal for fast-paced content like gaming. Next, visit Settings > Output to set your streaming/recording quality: Bitrate: For streaming, 5000 Kbps is a solid starting point (adjust based on internet speed). Recording Format: MP4 is widely compatible, but MKV avoids file corruption if crashes occur.
Step 2: Connect to Streaming Platforms
Under Settings > Stream, link OBS to platforms like YouTube, Twitch, or Facebook: Select your platform and log in to authorize OBS. To keep an eye on conversations and broadcast health without ever leaving the app, use YouTube Live Control Panel in OBS.
Step 3: Create Your Sources & Scenes
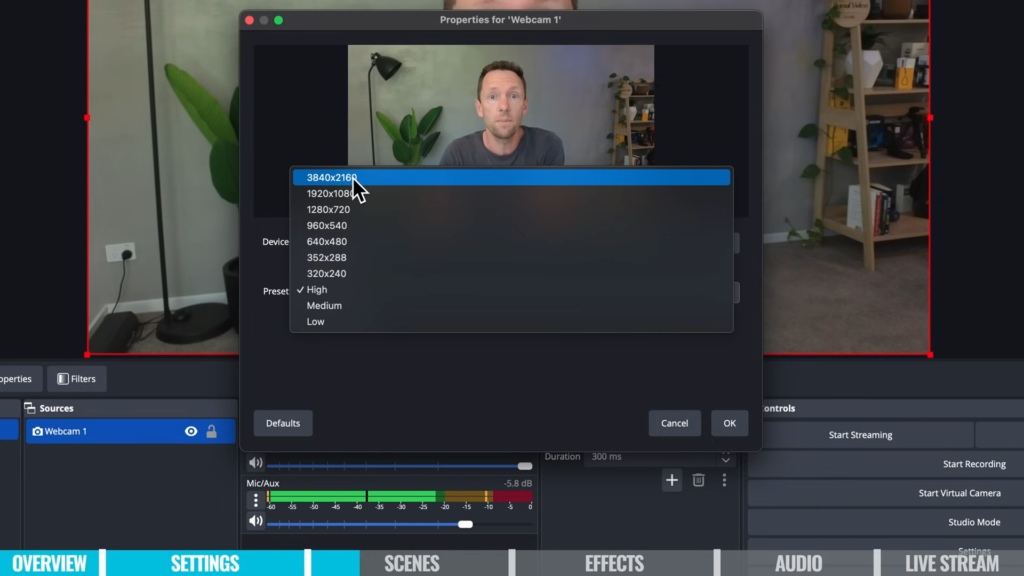
Scenes are many layouts that you can alternate between, such as “Talking Head” and “Screenshare.” Each scene’s components are its sources. Including a Webcam: Under Sources > Video Capture Device, click the plus symbol.
Choose your webcam and give it a name, such as “Main Camera.” Use drag-and-drop to place the stream and change the resolution (1080p is advised).
How to Include a Screenshare:
Make a brand-new scene, like “Presentation.” Click + > Display Capture to share your entire screen or a specific window.
Mix Scenes Like a Pro:
Duplicate scenes to create variations (e.g., “Screenshare + Camera”). Hold Alt/Option while resizing sources to crop edges (perfect for picture-in-picture layouts). To share a single window or your entire screen, choose + > Display Capture.
Mix Scenes Expertly:
Make variants by duplicating scenes (e.g., “Screenshare + Camera”).
To resize sources to crop edges (ideal for picture-in-picture layouts), hold Alt/Option.
Step 4: Use Filters to Improve Visuals To apply filters, right-click on any source:
Chroma Key: For personalized backdrops, eliminate green screens.
Color correction involves adjusting saturation, contrast, or brightness.
Scroll: Give words or pictures movement.
Step 5: Enter Your Audio In Settings > Audio, choose your microphone, and change the mixer’s levels:
Reduce background hum by using the Noise Suppression feature (right-click mic > Filters).
Desktop Audio: Mute this if you don’t want system sounds in your stream.
Step 6: Go Live (or Record)!
Streaming: Click Start Streaming and monitor chat via the docked panel.
Recording: Hit Start Recording files save to your chosen folder (set in Settings > Output).
Bonus: Zoom, Teams, and Other Features with a Virtual Camera
Turn on To utilize your unique layouts during video calls, launch Virtual Camera in OBS. Ideal for adding overlays during meetings or creating polished presentations!
Expert Advice for Novices
First, test the audio/video sync by doing a trial recording or stream.
Enable Studio Mode under View > Studio Mode to preview changes before they go live.
Hotkeys: In Settings > Hotkeys, assign shortcuts for scene switching.
Are You Prepared to Advance?
Once you understand the fundamentals, OBS Studio opens up a world of creative possibilities. To make your content stand out, try using sophisticated filters, unique transitions, and multi-scene setups.
Leave a Reply