
In this article, I am writing about the desktop video enhancement application for macOS and Windows Topaz Video AI. The latest version of Topaz Video AI is a completely new video editing software compared to it is the previous version. This incredible video editing software is completely Remastered, Pre-engineered, Redeveloped and Re-architecture. All of these updates have made Topaz video AI more fast and smoother as well as more user-friendly.
What Topaz Video AI Can Do?
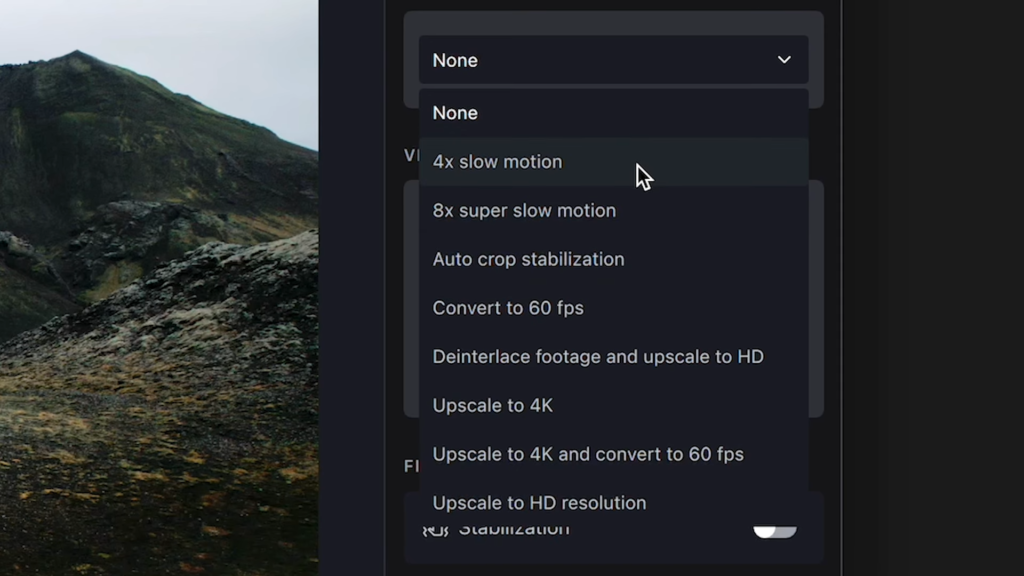
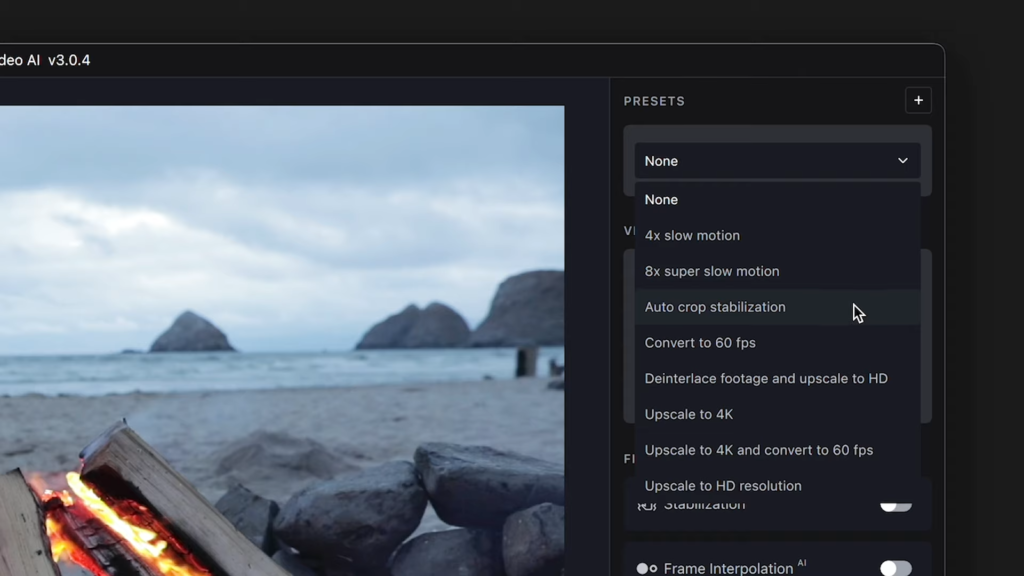
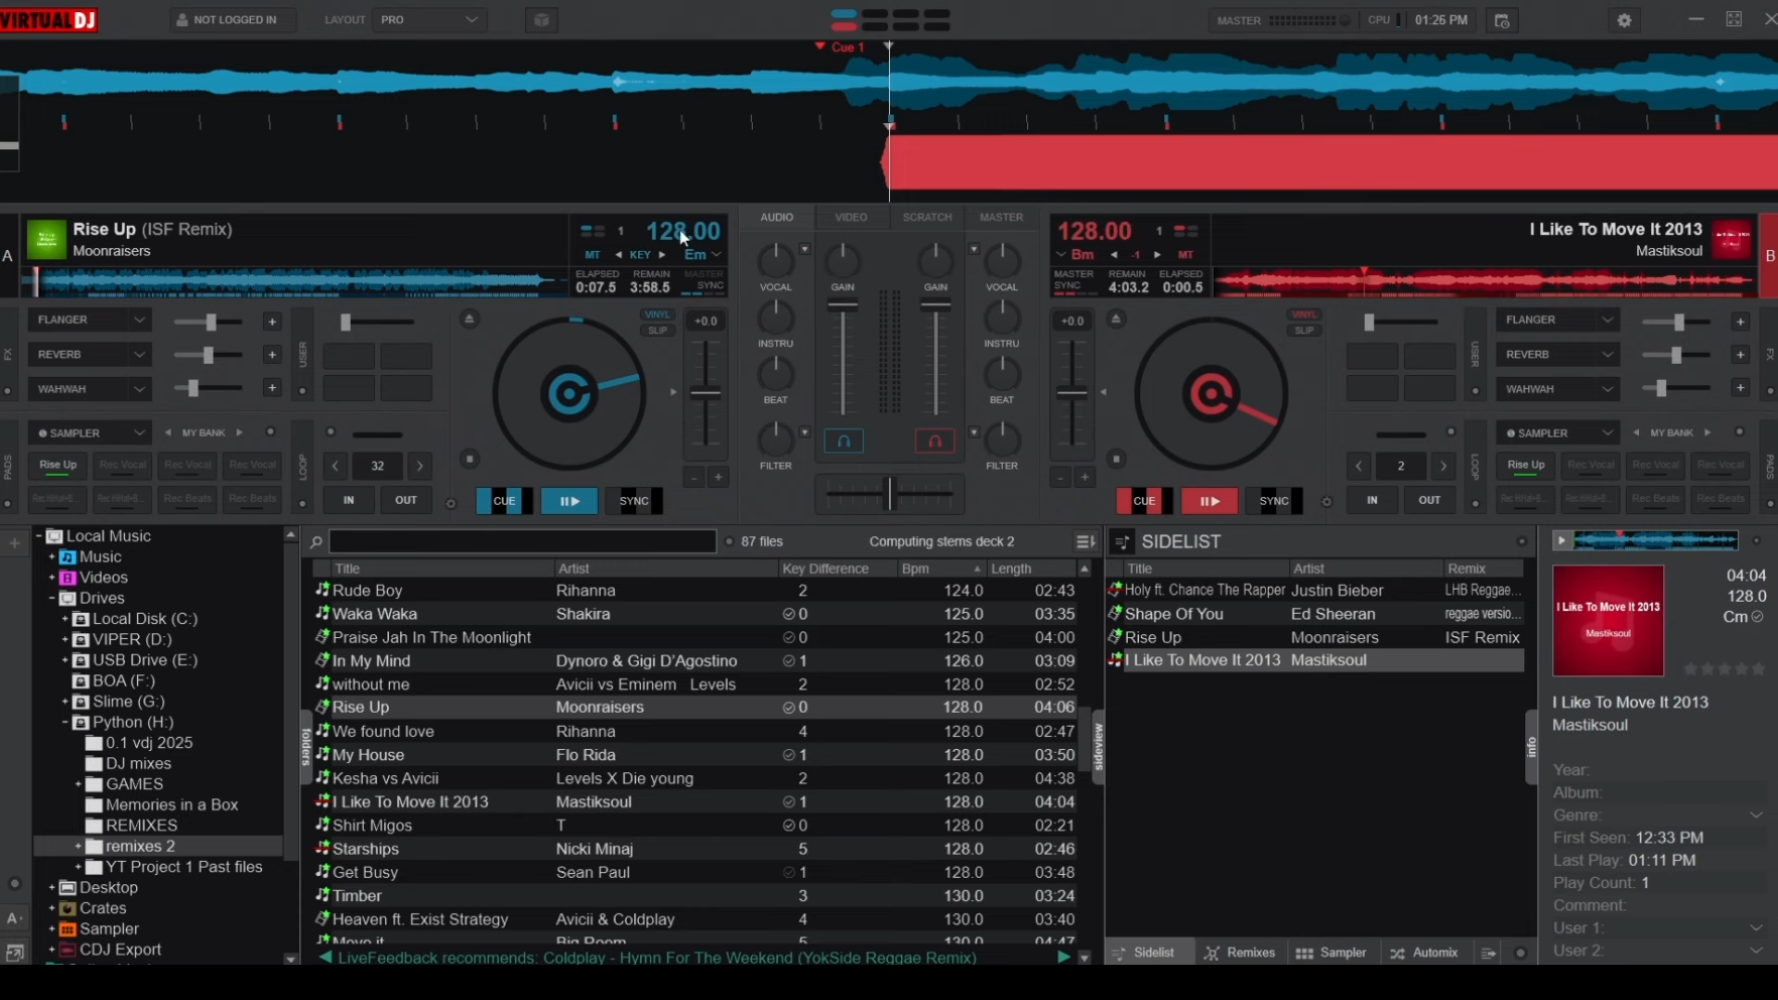
You have to select one or more videos on your desktop and drag them into the timeline of Topaz Video AI. Now, select one of your imported videos and click the Preset menu in the top-right corner of your desktop. Now, choose any enhancement that fits your needs. This Drop-down menu contains a ton of impressive enhancement options like Upscale to HD resolution, Deinterlace footage and upscale to HD, Upscale to 4K, convert to 60 fps and also last two features both combined.
The technique used to enhance the quality of video in Topaz Video Ai is very different from other video-enhancing software in the market. Topaz Video AI uses Artificial Intelligence and Machine Learning to improve and fill in the missing details of imported video. If you upscale your videos from 1080p directly to 4K, the results will blow your mind. The results are super singly authentic and natural.
Slow Motion Feature
You can also find the slow motion feature in the top right corner of the presets drop-down menu. This feature will blow your mind, and it feels like magical work. This feature will take video no matter what frame rates the video has and Topaz video AI stretches everything out. Now, fills in the missing gaps and frames by using machine learning and artificial intelligence. It creates new frames between the original frame to create more frames per second. Due to this process footage can be perfectly and smoothly slowed. The results are surprisingly natural and real-looking. You can not easily distinguish between traditional video frames and new frames created by Topaz Video AI. It also contains different AI models for different types of footage like motion blur, etc. The result will look like it is captured by a very expensive camera.
Stabilization feature
This feature is new in this software and only presents the latest versions of Topaz Video AI. This feature is very similar to the warp stabilization effect of its rival video editing software. This effect works by stabilizing your object in Vedic and crops out from the edges.
But if you choose the Full Frame effect option, instead of cropping video from edges. It fills holes and gaps with the help of artificial intelligence.
Preview Feature
You can get an enhanced version of your raw footage without exporting the whole video. This feature saves a lot of work also in terms of time it is very user-friendly. You have to use the timeline scrubber that is present at the bottom of the video screen. You can move to the location where you want to get an enhanced preview of the video. You can also choose the duration of the preview video according to you ranging from 10 seconds to 15 seconds. When you are ready click the blue preview button. Now you can export enhanced according to you.
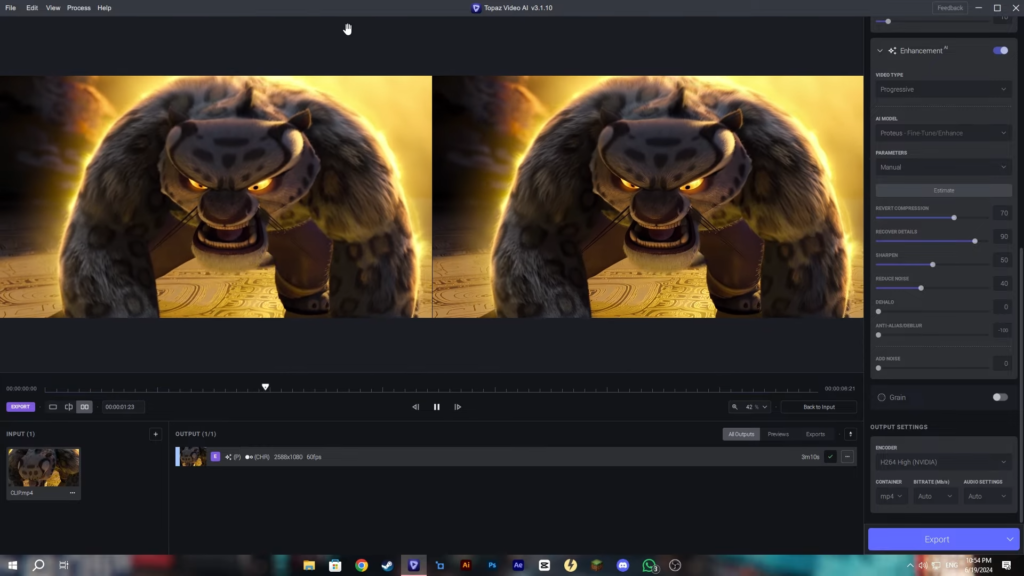
Customizable Enhancement
You can apply enhancement settings according to your without using the pre-built enhancement feature. You have to go to the enhancement features panel in the top right corner of the desktop. With the help of features, you can mix and match different enhancement features for better quality and results.
Transform Your Video Quality: A Professional Guide Using Topaz and After Effects
Part 1: Upscaling and Smoothing with Topaz Video Enhance AI
Step 1: Import Your Footage
Launch Topaz Video Enhance AI and import your video. This tool excels at intelligently upscaling resolution while preserving critical details, making it ideal for revitalizing low-resolution clips.
Step 2: Optimize Settings for Maximum Quality
Resolution: Stick with “Original” to maintain the aspect ratio. Topaz will upscale details without stretching pixels. Frame Rate: Increase to 60 FPS for smoother motion, especially useful for animated content or action scenes.Frame Interpolation: Choose Kronos. This algorithm reduces motion blur and artifacts, perfect for mimicking the fluidity of Disney-style animations.
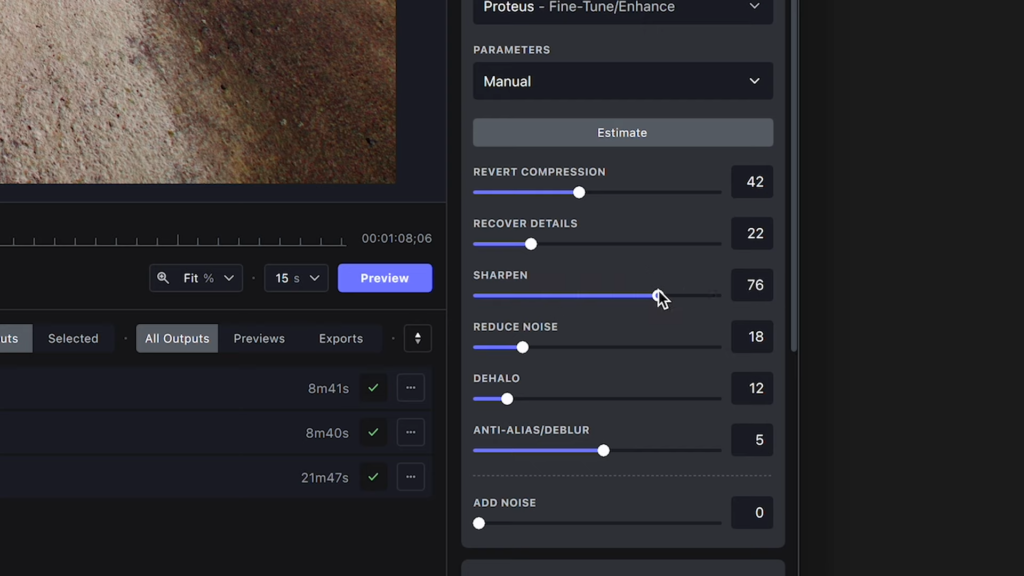
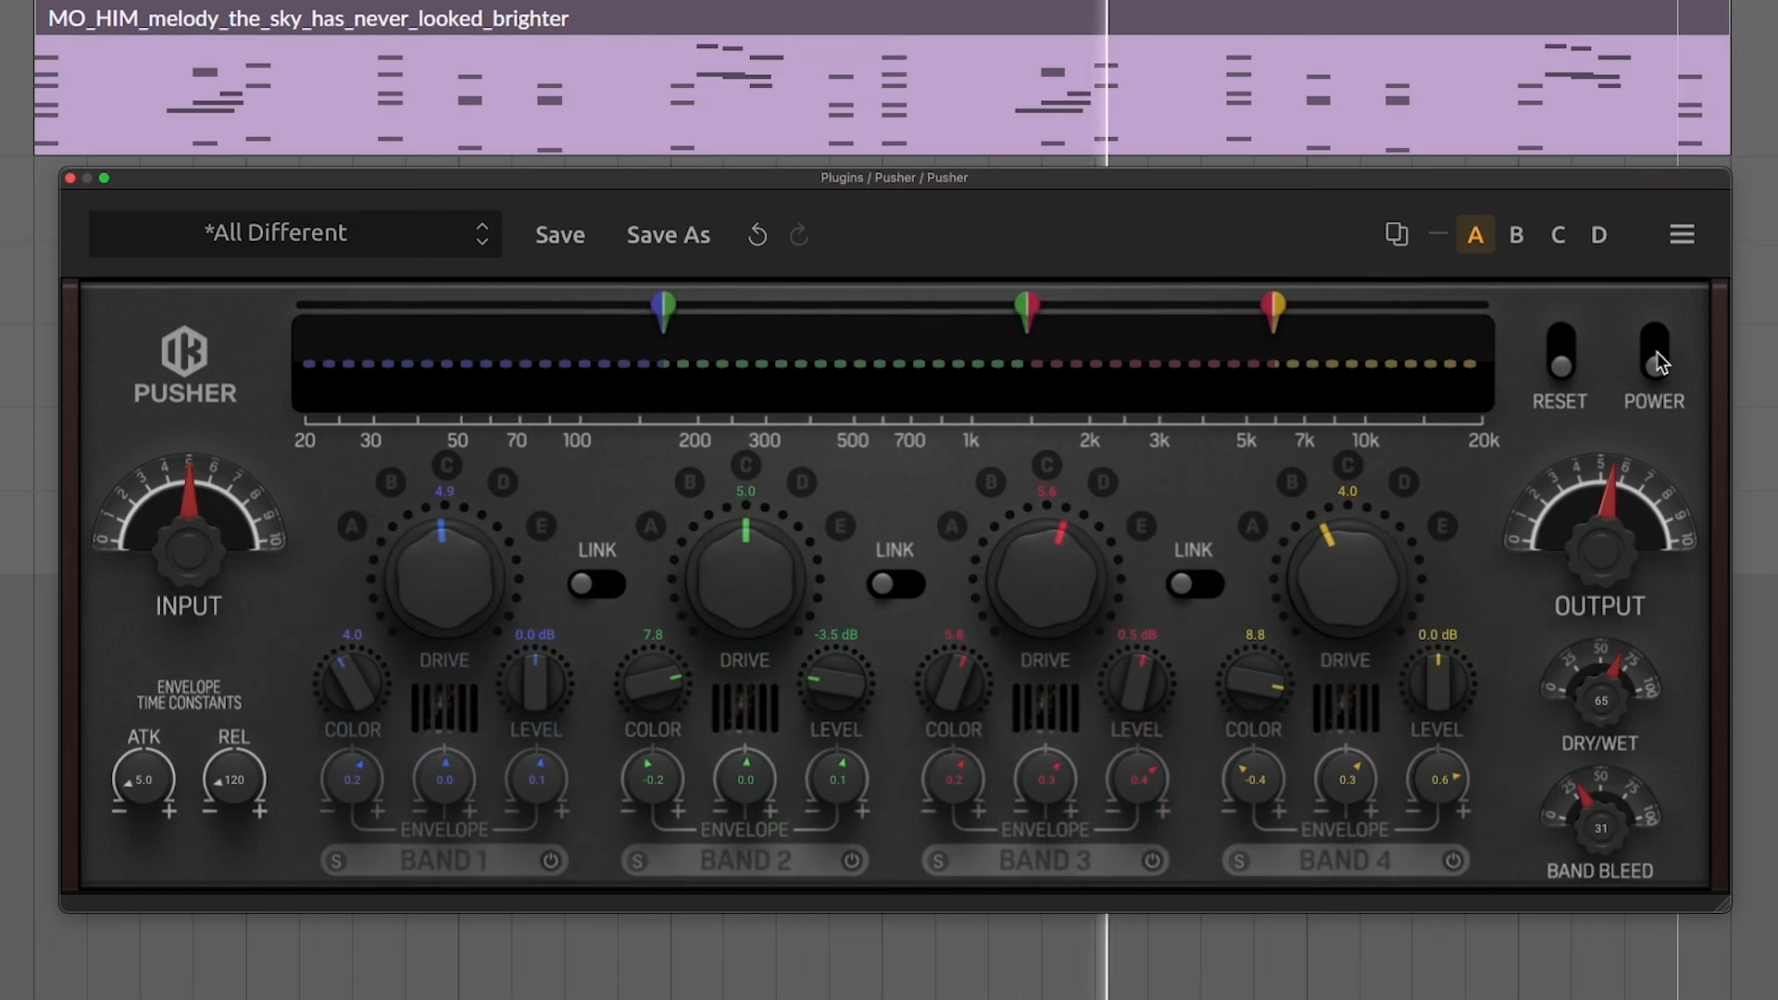
Step 3: Fine-tune Enhancements
Switch to manual mode to customize the output quality. Noise Reduction: Balance between cleaning up grain and preserving texture (start at 40-50%). Detail Recovery: Set to “High” to sharpen edges and textures. Bitrate: Keep this on “Auto” unless targeting a specific file size.
Step 4: Export and Review
Click “Export” and allow time for processing (this varies based on clip length and hardware). Once complete, compare the upgraded clip to the original—you’ll notice sharper lines, reduced noise, and smoother transitions.
Part 2: Cinematic Color Grading in After Effects
Step 1: Import the Enhanced Clip
Open After Effects and import your Topaz-processed video into a new composition.
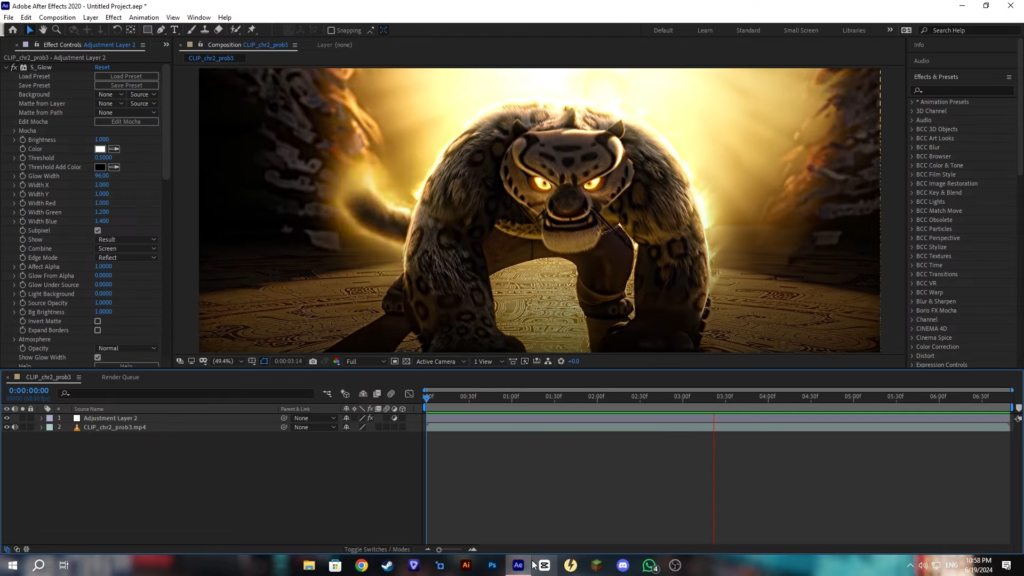
Step 2: Create an Adjustment Layer
Go to Layer > New > Adjustment Layer. This non-destructive layer lets you apply effects without altering the original footage.
Step 3: Apply Color Grading
For a cinematic look, use a professional color correction (CC) preset. Here’s how: Search for your desired CC preset (e.g., “Warm Golden Tone”) and drag it onto the adjustment layer. Adjust intensity using the effect’s opacity slider or blending modes (try “Overlay” or “Soft Light” for subtlety).
Pro Tip: Custom presets streamline workflows. The gold-toned preset featured in our demo is available for download here—ideal for adding depth to animated or live-action projects.
Step 4: Final Tweaks and Export
Sharpen Details: Add a subtle “Unsharp Mask” effect to enhance edges. Preview: Scrub through the timeline to ensure consistency. Export: Render your final video in H.264 format for web use or prove for archival quality. Before vs. After: The Results Speak for Theyself.
Original Clip: Pix elation, inconsistent frame rates, and flat colors. After Topaz, Crisp details, smooth 60 FPS motion, and reduced noise. After Effects: Rich, cinematic colors with balanced highlights and shadows. Pro Tips for Flawless Execution
Match Settings to Content: Use lower noise reduction for gritty textures (e.g., vintage films) and higher recovery for animation.
Hardware Optimization: Close background apps to speed up Topaz’s rendering. Preset Customization: Save your favorite After Effects adjustments as a preset for future projects.
Frequently Asked Questions
Q: Can Topaz fix severely compressed videos?
A: While Topaz works wonders with mild compression, heavily pixelated footage may still show limitations. Pair it with manual cleanup in After Effects for best results.
Q: Are free CC presets effective?
A: Yes! Sites like Cinecom and Premium Beat offer free presets, but premium packs often provide finer control.
Q: What’s the ideal bitrate for YouTube uploads?
A: For 1080p/60 FPS, aim for 12–15 Mbps. Check YouTube’s encoding guidelines for specifics.
How to Upscale Your Videos to 4K in DaVinci Resolve: A Step-by-Step Guide
If you’ve ever wanted to breathe new life into your HD or lower-resolution videos, upscaling them to crisp 4K can make a world of difference. Whether you’re enhancing old footage or prepping content for platforms that favor 4K, DaVinci Resolve offers a straightforward way to achieve professional results. In this guide, we’ll walk you through the process of upscaling your video to 4K using DaVinci Resolve’s powerful tools. Let’s dive in!
Why Upscale to 4K?
4K resolution (3840×2160 pixels) delivers sharper details, richer colors, and greater flexibility for cropping or editing. Many streaming platforms, like YouTube and Vimeo, prioritize 4K content, making it a smart choice for creators aiming to stand out. While upscaling won’t magically turn HD into true 4K, DaVinci Resolve’s advanced algorithms help minimize quality loss, ensuring your video looks its best.
Scroll down and select 3840 x 2160 Ultra HD (or “4K DCI 4096 x 2160” if you prefer cinematic proportions). Click OK to apply the new resolution. Pro Tip: Ensure your timeline frame rate matches your original footage to avoid playback issues.
Step 1: Enable Super Scale for Upscaling.
Right-click your clip in the timeline and choose Clip Attributes. Navigate to the Super Scale dropdown under the Video tab. Select 4X (or choose a lower multiplier like 2X if your source is closer to 1080p). Click OK to confirm.
What’s Super Scale?
DaVinci Resolve’s Super Scale uses AI-driven upscaling to enhance details and reduce artifacts. While 4X works well for 720p to 4K, experiment with lower scales for better performance on older hardware.
Step 2: Fine-tune with Noise Reduction and Sharpening.
For even cleaner results: Switch to the Color workspace. Add a new node, right-click, and apply Temporal Noise Reduction to smooth out the grain. Use the Sharpness tool sparingly to avoid over-processing. Exporting Your Upscaled Video. Go to the Deliver tab. Choose your preferred format (H.265 is ideal for 4K). Under Resolution, confirm it’s set to 3840×2160. Click Add to Render Queue and start exporting. Pro Tips for Better Results:
Start with the best source possible: Upscaling works best with high-bitrate, well-lit footage. Avoid over-sharpening: This can introduce unwanted halos or noise. Test shorter clips first: Render a 10-second segment to check quality before processing the entire video.
Leave a Reply